Get to know your Point of Sale (POS) solution

Your Barclaycard Smartpay Hub base unit at a glance
Let’s take a closer look at the front of the unit...
1) Tablet LED
Shows if the base unit’s on or off.
2) Tablet hinge
You can tilt the screen angle.
3) Receipt printer lid
The paper roll lives in here (find out how to change the till roll).

4) Base unit LEDs
Here’s what the different LED colours mean:
Flashing white – the unit’s starting up
Solid white – it’s ready to use
Solid blue – it’s connected to the tablet by Bluetooth
Quick flashing blue – Bluetooth’s available
Slow flashing blue – Bluetooth’s not active
And here’s the back of the unit...
1) Tablet lock
Keeps the tablet locked to the base unit.
2) USB ports
You can use these ports to plug in barcode scanners and other extra devices (you can get these via pdqconsumables).
3) Ethernet port
We’re working on developing this – so you can’t use it just yet.
4) Cash drawer connector
For an optional RJ12 cash drawer (you can get this through pdqconsumables).

5) Cable strain relief
Keeps the power and connector cables in place.
6) Power jacks
You can plug the power supply into either of these.
7) Fixing bracket
So you can secure the base unit to your counter (see out page about setting up your Smartpay Hub).
Receipt printer
1) Pinhole reset button
You can use this to reboot the system (see troubleshooting section below).
3) Pairing button
Allows Bluetooth pairing between the base unit and tablet.
5) Tear strip
Lets you tear paper rolls easily.

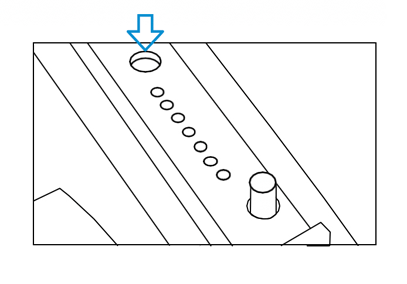
2) Indicator LEDs
Show you what’s going on with the base unit and any other devices that are plugged in.
4) Paper roll compartment
Holds 80mm paper roll for printing receipts.
Specifications
|
Physical connections on the base unit
|
Receipt printing
|
|
Controls and status lights
|
Compliance 
|
|
Communication
|
Power and charging
|
|
Physical dimensions
|
Supported devices The Barclaycard Smartpay Hub supports connection to the following extra devices:
|

Need to reset?
If the base unit ever stops responding, you can safely reboot it.
Just open the lid of the paper roll compartment and press the pinhole reset switch. The white LED should switch off and then flash to show the base unit’s rebooting.
Traffic-light LEDs
There are seven LEDs in the printer compartment. Here’s what all those coloured lights mean.
|
LED colour (top to bottom) |
State |
What it means |
|---|---|---|
|
Green (overall status) |
On |
Ok |
|
Flash |
Tamper alert (with red LED) |
|
|
Red (tamper indicator) |
Flash |
Tamper alert (with green LED) |
|
Yellow (not assigned) |
||
|
Yellow (PED status) |
On |
Connected |
|
Off |
Disconnected |
|
|
Flash |
Comms activity |
|
|
Yellow (tablet comms) |
On |
Connected |
|
Off |
Disconnected |
|
|
Flash |
Comms activity |
|
|
Yellow (scanner) |
On |
Connected |
|
Off |
Disconnected |
|
|
Flash |
Scan activity |
|
|
Yellow (printer) |
On |
Connected |
|
Off |
Disconnected |
|
More on your Barclaycard Smartpay Hub
Visit our Barclaycard Smartpay Hub page, or contact our support team and we’d be happy to help.